The Great Pumpkin

Recently I’ve been a little obsessed with fall…stalking fall decor pics on pinterest, burning fall scented candles and craving fall foods like butternut squash. On Sunday we bought a couple of pumpkins to carve, you know, 2 people, 2 pumpkins. However, Fabio was slightly less excited about the pumpkin carving so I carved them both. I never realized how “faiutile” pumpkins are. “Faiutile” is an Italian slang word used in Tuscany or maybe just by Fabio and his peeps, that basically means useful in a surprising way. Why is the pumpkin faiutile?? Well, I bought the pumpkins primarily to carve them for decoration. But then I had this craving for fall flavors that just wouldn’t quit. So, I decided to bake the seeds and made a soup with the pumpkin meat from the cutouts. Not only are the pumpkins now beautifying our space, which is obviously most important, but I made a snack and at least two meals from them. Talk about useful!

To bake the seeds, I followed a recipe that had a great comment from a reader which totally updated the recipe and made it way more fabulous.

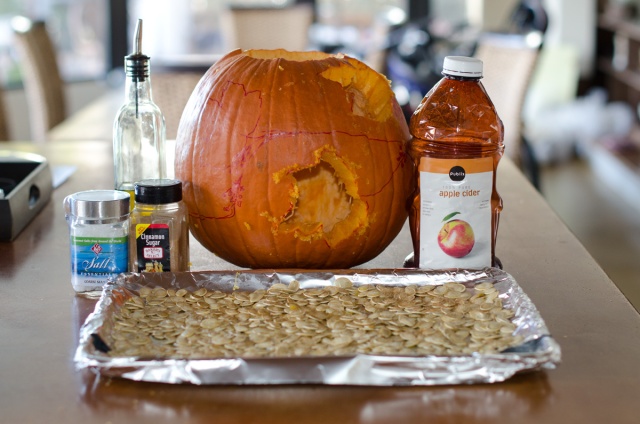
pumpkin seed roasting ingredients

Obviously I had already drawn my carving design on the pumpkin and hacked into it at this point. Anyways, for delicious pumpkin seeds…

1. Collect pumpkin seeds and clean them of all pumpkin “stuff”
2. Let them dry (not sure why- maybe the original recipe wanted them dry)
3. Boil the seeds in apple cider for about 10 mins (that was the awesome part)
4. Strain the seeds from the cider and spread them on a baking sheet that has been coated with olive oil (I cover the baking pan with aluminum foil so it’s easier to clean up)
5. Sprinkle the seeds with salt, cinnamon, sugar and cloves
6. Bake at 275 for 10-30 minutes or until golden brown

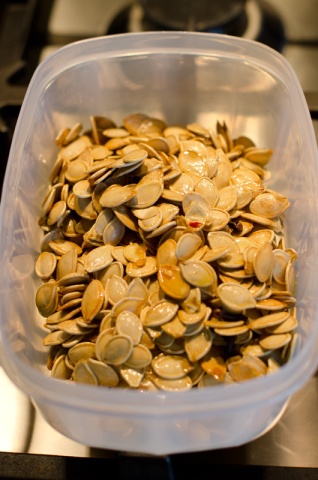
Holy delicious…

pumpkin seeds

Next up is the pumpkin soup which is a modification of a recipe I found online. The original recipe was more of a creamy soup and what I ended up making was more of a chunky stew.

You will need:

1. pumpkin meat…I used the cutouts from the two pumpkins I carved
2. 1 onion- sliced
3. 2 carrots- peeled and chopped
4. 1 apple- peeled and chopped
5. 1 cup of heavy cream
6. 3 cups of chicken or vegetable stock (I used 1.5 cups of chicken stock and 1 cup of whey- yes from Little Miss Muffit…eating her curds and whey. Fabio made ricotta on Saturday and whey was the byproduct left over after boiling the milk.)
7. A couple of cinnamon sticks
8. Cloves- however many you think is good
9. salt and pepper to taste

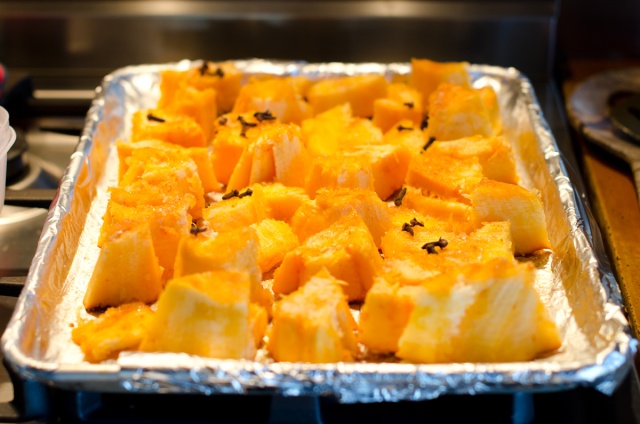
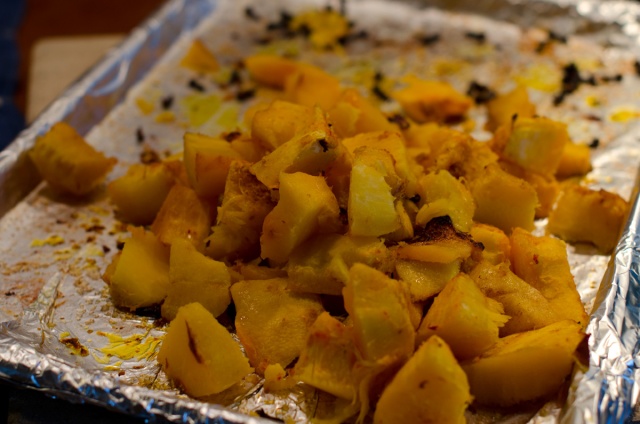
First, cut the pumpkin into about bit size pieces and bake in the oven at 400 degrees for about 30 mins or until soft when stabbed with a fork.

baked pumpkin

baked pumpkin

Next, saute the chopped onion, carrot, apple and pumpkin for about 10 mins in olive oil on med/med low. I added the onion and carrot first, then the apple because the onion and carrot take longer to cook. Next add the cream, chicken broth, cinnamon sticks, cloves, salt and pepper and let simmer for about 15 minutes. Be careful not to let the pumpkin get too soft. Then enjoy!

pumpkin stew

Oh, I almost forgot the most important part…the beautiful glowing carved pumpkin. I went non traditional and carved a leaf motif instead of the typical jack-o-lantern face.

carved pumpkin

Happy fall!
Posted in DIY, Uncategorized | Tagged , , , , , | Leave a comment

Beautiful Nature

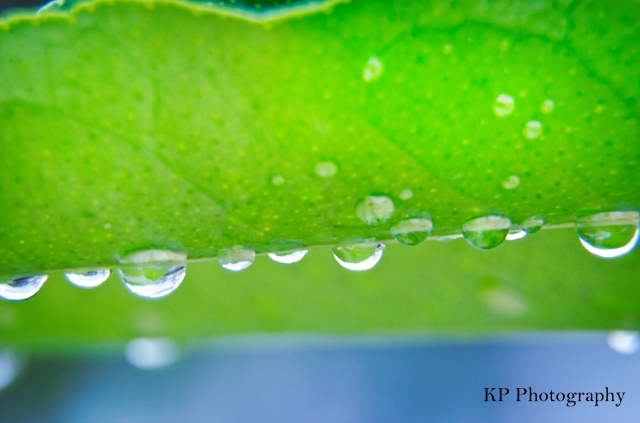
It’s been raining here for about a week straight. Yesterday morning there was a brief break between downpours and everything was covered in beautiful water drops. So I grabbed my camera and started shooting away. Below are my favorites.

macro nature photography

macro flower photography

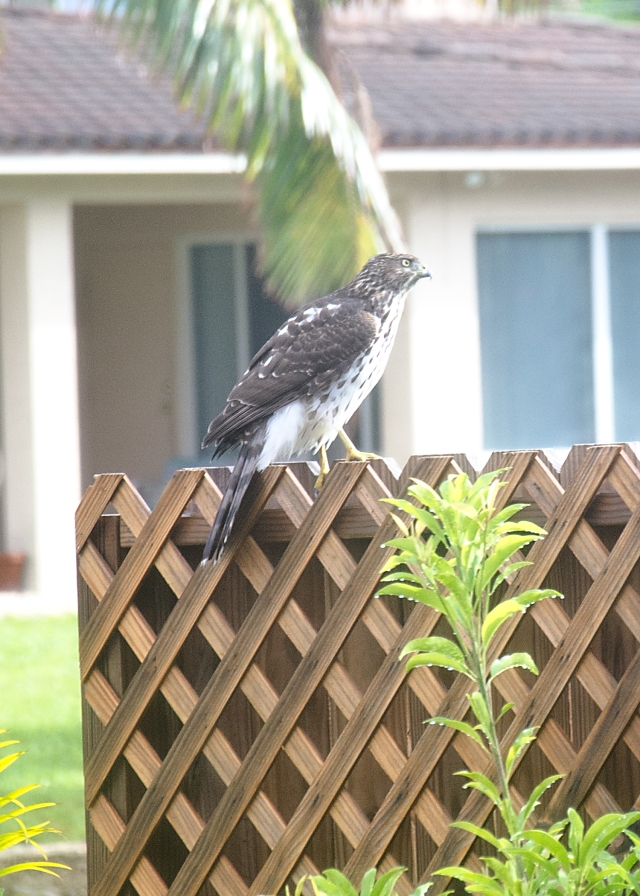
We even had a surprise visitor. All of a sudden Fabio said “grab your camera, hurry up! There’s a falcon or a hawk on the fence!” Of course I had my 50mm lens on the camera. I grabbed a quick shot for proof and then changed the lens. I was shooting through our film covered windows because we didn’t want to scare him away by opening the door.

HawkWe thought it was super cool. Anyways, enjoy the rest of your Monday!

Posted in Photography | Tagged , , | Leave a comment

Outdoor Vignette in the Works

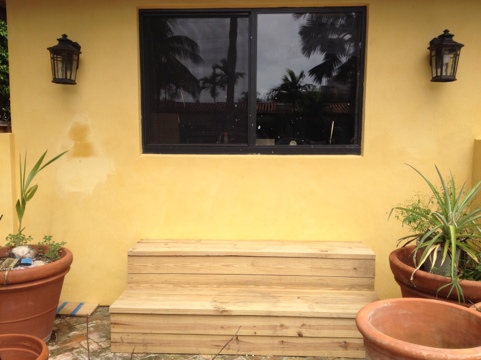
A month or so ago we had a couple of steps built in front of a window outside the house. We thought it would be cool to put pots of flowers on the steps that could be seen from inside when looking out the window. So the steps were built but have remained unstained and the empty pots all about.

steps

I got an itch to finish them after seeing all of the beautiful outdoor decor pictures on Pinterest.

Source: bhg.com via Kristin on Pinterest


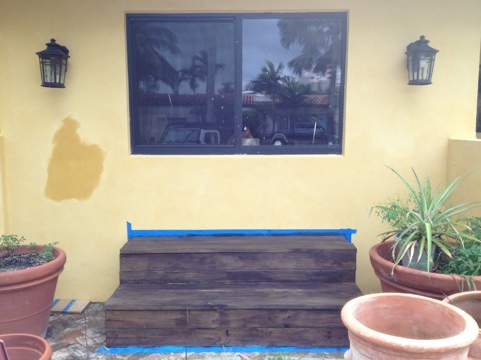
So today I cleaned them up, sanded and stained the stairs. I wanted to seal them today too but the daily tropical afternoon shower put a halt to that. That’s ok, I needed a rest in the AC. It’s still like 90 degrees here in Florida. Oh and that big blotch on the wall is where I’m trying to patch some weird stain that was on the house. It’s not that easy because I’m using lime paint and have to mix the color myself. This is the third attempt at a match. It’s not dry yet so hopefully it’ll work.

stained steps

I’m thinking about getting two of the big orange mums like are in the fist picture and put them in pots up top. I have a credit at a feed store (long story) so I’m thinking I can use that to buy some hay and put that in between the two pots with some pumpkins on top. I love the twiggy pumpkins in the second picture and those are super practical for outside. I’m afraid real pumpkins are going to rot quickly in the sweltering heat. I may not be able to resist them though. Especially the white pumpkins. I love them.

Anyways, this is what I’m up to. How about you??

Posted in Decor, The Great Renovate, Uncategorized | Tagged , , | Leave a comment

We Got a New Couch!

This is exciting news people. Fabio bought the couch we’ve been using bm (before me) and we’ve been together for 11 years. It was time for an update. Not because the couch did anything wrong, it was what was done to it by the irresistible Papi.

Papi

I couldn’t resist posting this picture even though the quality is horrendous. Papi would make these kind of faces begging to get on the couch. Who could resist that ridiculous face?! But Papi drooled on the couch, licked it and hopped on it when he wasn’t his cleanest so needless to say a beige couch will show signs of wear.

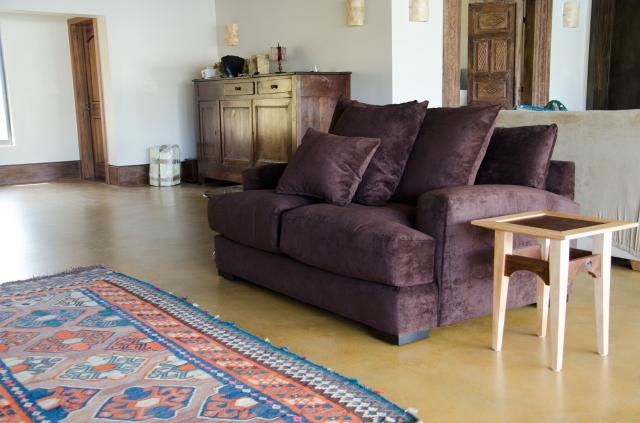
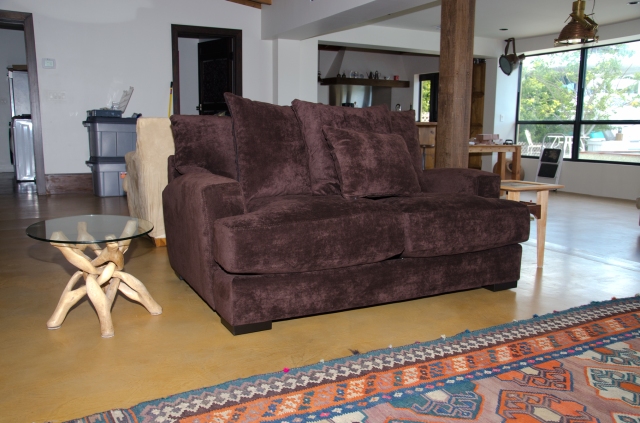
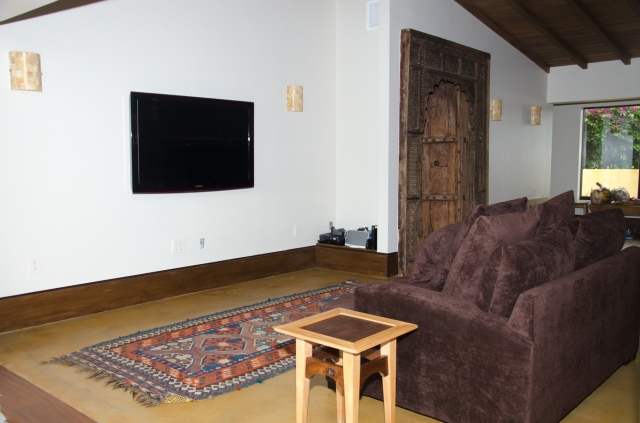
About six weeks ago Fabio and I went shopping for a couch and it was actually pretty painless. Fabio has a time meter for shopping. I like to relate it to scuba diving.  You only have so much air and when you’re down to 500 psi you gotta go up. Luckily we found a perfect fit for us at Z Gallery before Fabio was down to 500. The stock model only came in an off white so we looked through the color choices and selected Godiva, a super rich chocolate brown. Darker than dirt. Just kidding. We were given an estimate of 6-8 weeks before delivery and I think it was actually more like a 5 week wait. The couch was delivered yesterday. Stella is her name and she’s actually a loveseat.

Stella Loveseat


Stella Loveseat


We opted for a loveseat because even with a larger couch it’s kind of awkward having three people sit on it together. The visitor doesn’t really want to be that close to you. We don’t watch sports so we won’t be having any game day tv watching parties and don’t need a bunch of seats for people to watch tv. We’ll probably get a couple of small chairs for the area or maybe just move them from the future conversation area if we need extra seating.


Stella LoveseatWe really like the low back because it doesn’t block the view to the windows. It’s a classic design but a little more structured than our former couch and the microfiber fabric is super cozy.

Oh and yes I know the area isn’t styled all perfect and I have junk all over the place. My life isn’t a magazine, we’re still remodeling and have projects going on all over the place. If I wait to post photos until the area looks perfect it’ll never happen. I’m sure someone else’s place looks like this…or at least I hope it does.


Posted in Furniture, The Great Renovate | Tagged , , , | 4 Comments

New Life for an Antique Light

We’ve had lots of little projects going on around the house. Most of them are in an unfinished state but we finally completed one! Tadaa…

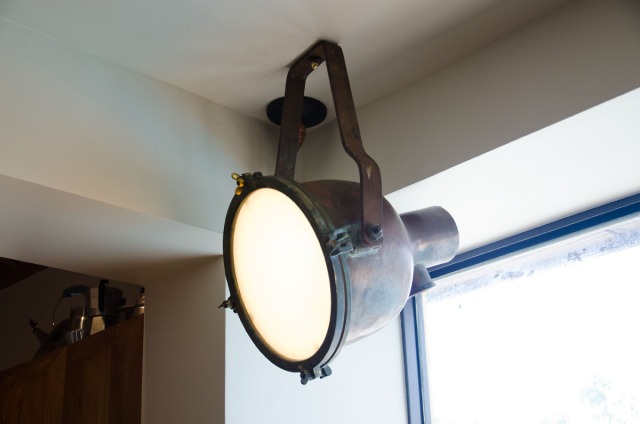
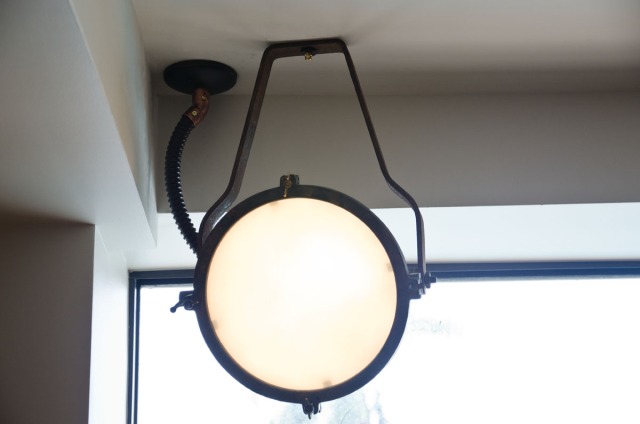
Antique Ship Light

Antique Ship Light

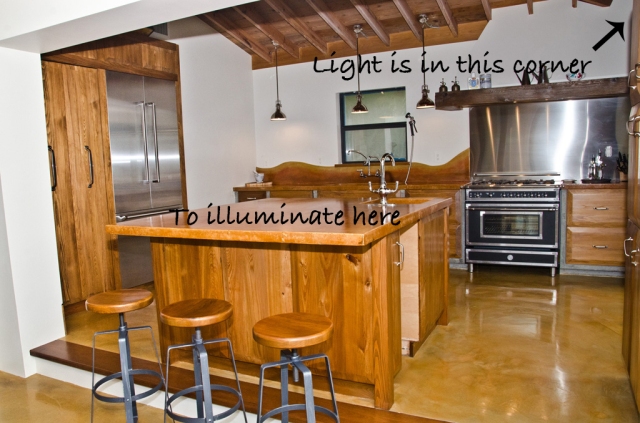
Fabio had this antique ship light at his house in Italy which we recently shipped here along with some other furniture and antique treasures. We wanted to use the fixture to light the bar side of our island which is kind of dark. I can’t show you a current picture because our house is a total mess as we’re in project land but here’s a little diagram so you can get an idea.

island

I found a light bulb converter to enable the use of a regular light bulb and rewired the lamp with the advice of the Home Depot electrical associate. It was actually pretty easy. We then sprayed the interior of the light white because it was kind of dingy and thought it would reflect more light from the bulb. We also decided to frost the glass so you can’t see inside the fixture which we totally love! The coil pipe going from the fixture to the ceiling is silver electrical tubing so I spray painted it oil rubbed bronze and we connected it to the canopy with a copper fitting. People told me to just get the canopy at Home Depot but HD only has like three choices and they are all ugly! So I relied on my bff google and was able to find a simple oil rubbed bronze canopy that we’re really happy with.

One project down and 999 to go!

Today we’re getting another project going. We’re having gutters installed. I know, sounds kind of boring but with the torrential rains here in Florida our pond gets flooded and the plants get crushed so we’re pretty psyched about the gutters.

What projects are you working on?

Posted in DIY, Lighting, The Great Renovate | Tagged , , | Leave a comment

Landscaping Happenings

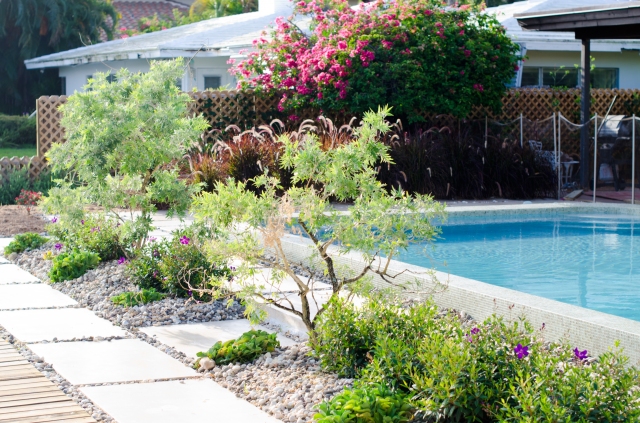
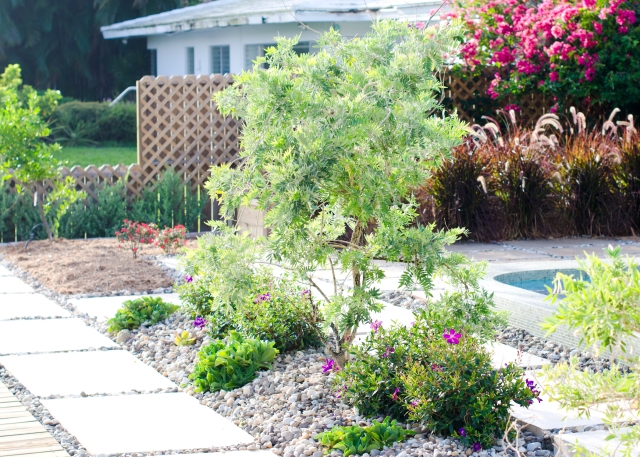
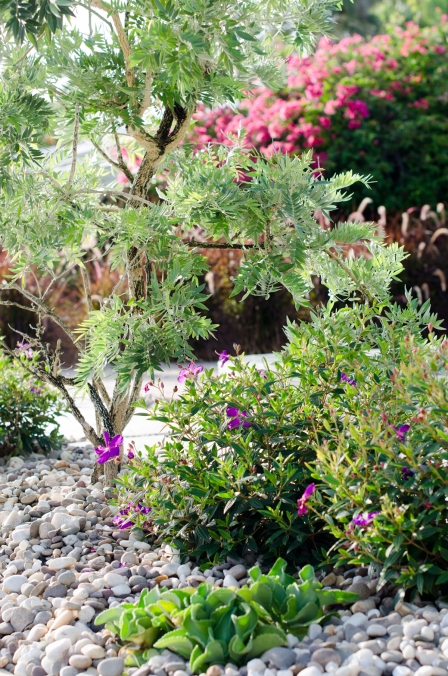
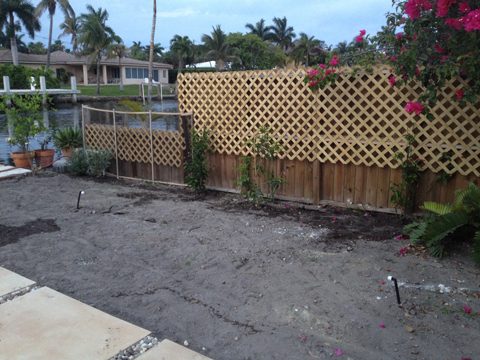
Hey there, it’s been a while! Major improvements have happened in the landscaping department recently so it motivated me to get blogging again. 🙂 The last work we really did in the backyard was in May. In the planters in front of the pool we planted 2 African Silver Leaf trees, some Tibouchina and some Chenille ground cover.

Planter Before

Planter Before

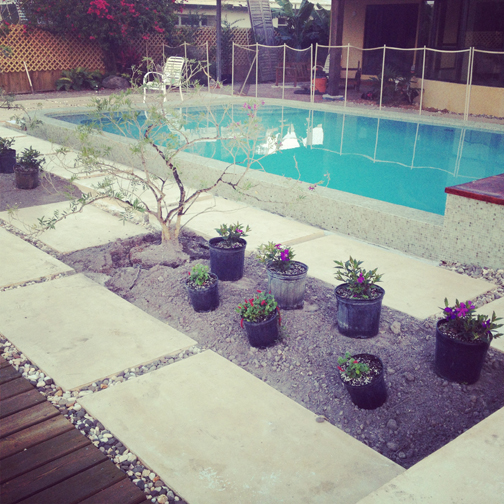
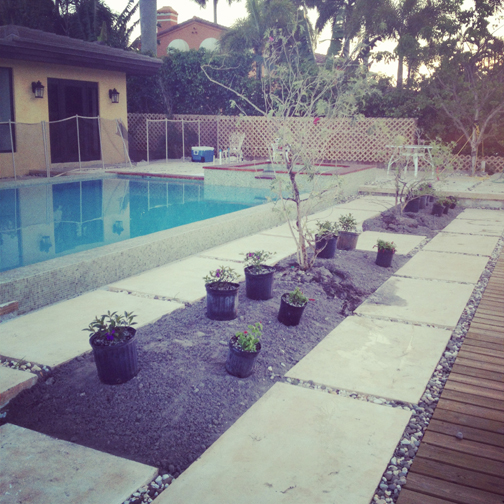
Yesterday we got it together and finished putting down black paper and filled the planter beds with rocks. Looking back at these pictures I can’t believe how much the plants have grown in three months. We ended up having to move the chenille ground cover to the front yard because the iguanas were eating them. Yes, iguanas. Fabio is in an all out battle with them because they are eating our plants. The iguanas are losing. 🙂 We also added some cactus type plants that we call brains.

Planter Bed Now

East planter

Planter Close up

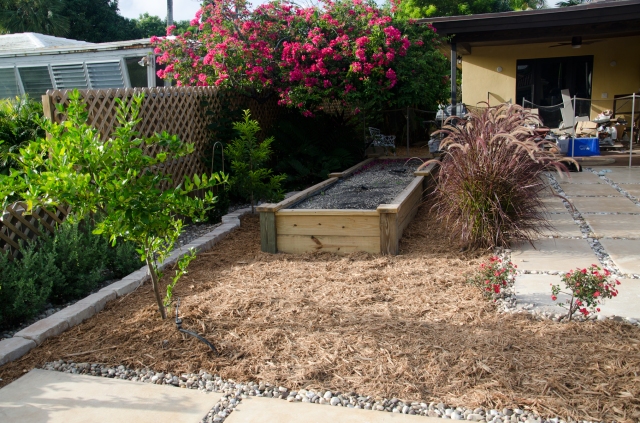
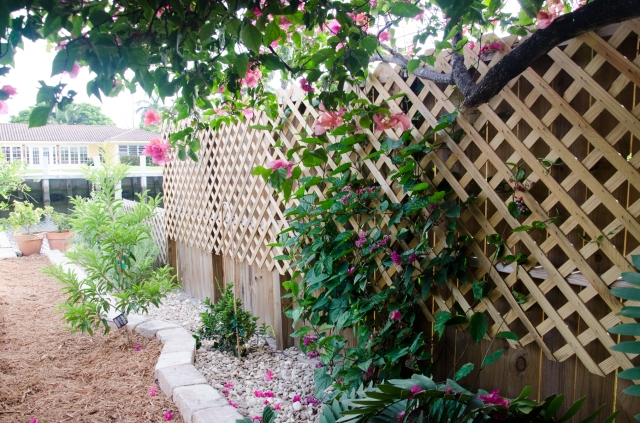
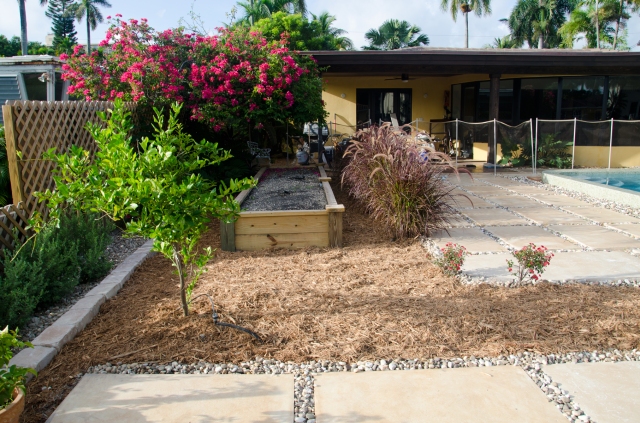
In May we also planted Perennial Grass that separates the future sunbathing area from the raised bed, Texas Sage on the left that creates a hedge in front of the fence, a Sapodilla Tree in the middle that produces a delicious fruit that tastes like a pear soaked in brown sugar and a Bleeding Heart vine that we’re hoping will take over the trellis at some point. On the far left is a lime tree. Please excuse the Instagram obsession.

Perennial Grass

Here’s another pic of the area in May. Blank slate!

Raised Bed Area in May

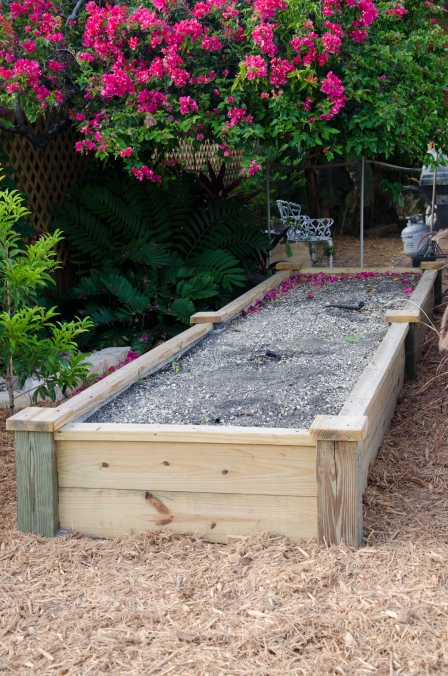
In June we had a raised bed built and soon we hope to start a veggie garden!

Raised Bed

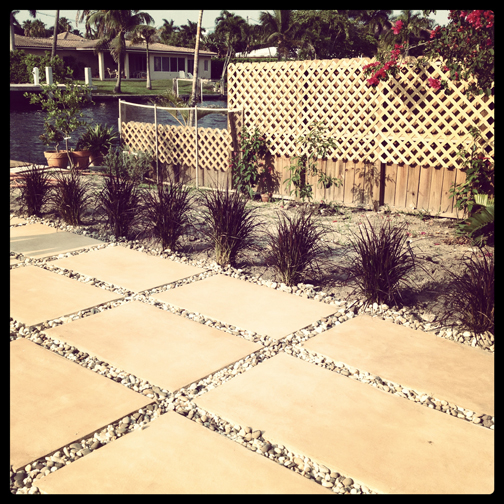
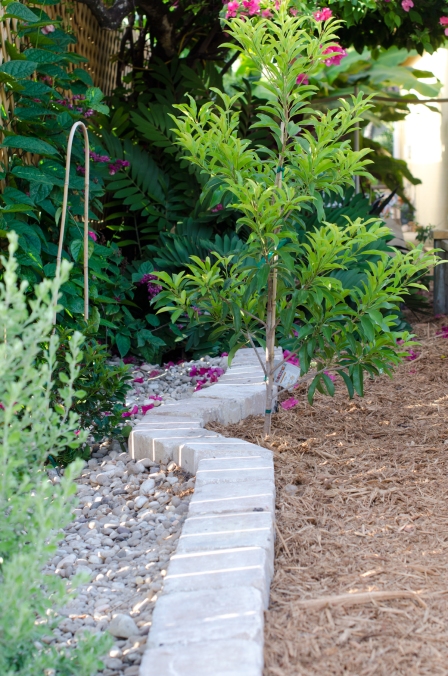
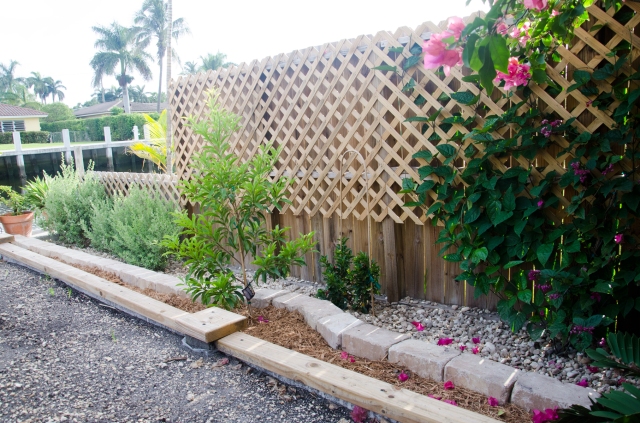
Until yesterday the area around the raised bed was completely filled with weeds. We had the area cleaned out and laid a row of large paver bricks to create a retainer wall to prevent the mulch from washing away when it rains. The bricks also created a nice little planter bed for the plants that were installed in May.

Mulch Area I know you’re probably wondering what those two little plants with red flowers are doing on the bottom right. Those are part of Fabio’s love for trying just a couple of plants to see how they do. They’re cute but we definitely need more.

Most people would have put grass where the mulch is but we really don’t want to mow grass or pay someone to do it for us. Hence, the mulch. We want to put more plants in the future but for now it’s mulch land.

Below is a shot of the baby Sapodilla tree. It’s probably two or three years old now but it was in a small pot for a while which probably stunted its’ growth. The baby is free now and looks really happy.

Brick Paver Bed

Brick Planter

Brick Planter

Bleeding Heart Vine

Close Up of the Bleeding Heart Vine

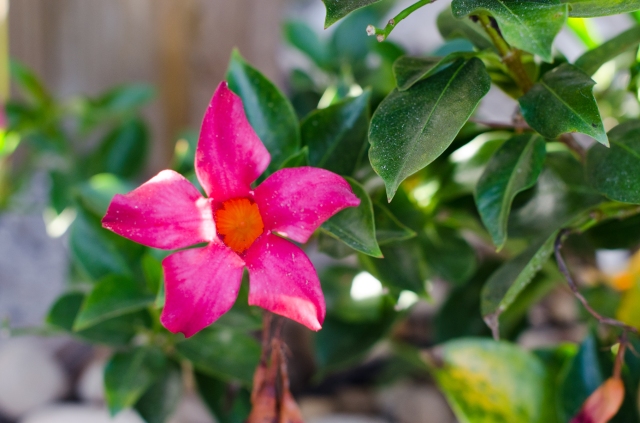
The poor Mandevilla vine has one flower left. We have a drip irrigation system set up but I don’t think she was getting enough water so I changed out the head yesterday. I’m sure she’ll have more flowers soon.

Mandevilla Vine

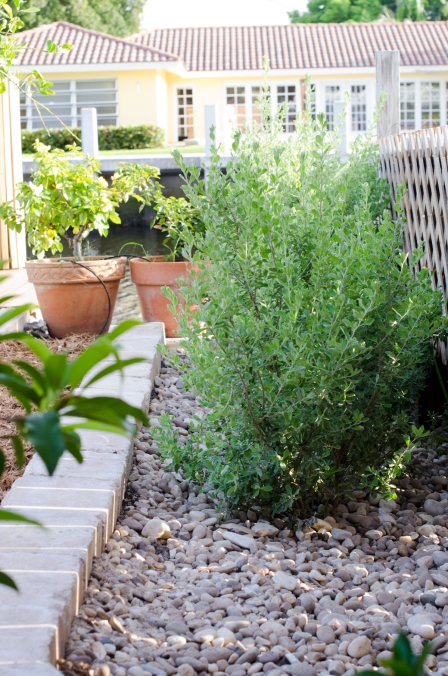
Texas Sage

Texas Sage

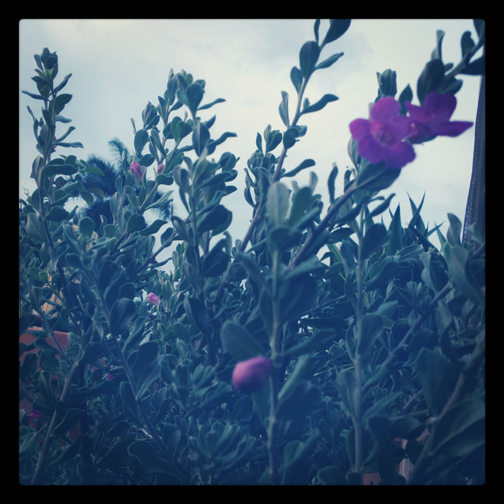
The Texas Sage makes pretty purple flowers every so often. I’m not real sure what makes them flower but the bushes are really pretty when they’re flowering.

Texas Sage

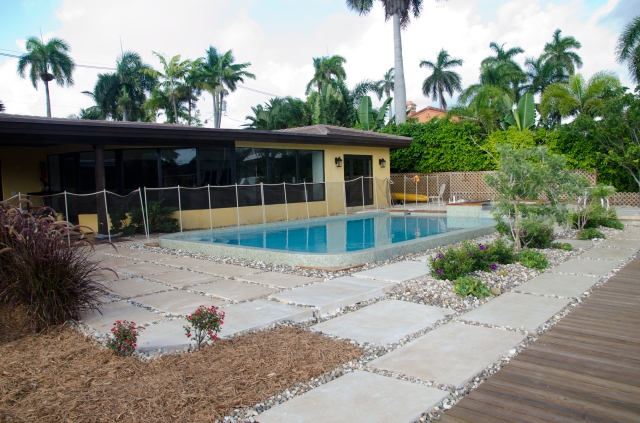
I must say I’m super happy with the way the backyard is shaping up. Much better than overgrown weeds!

Area Overview

Final Overview

Posted in Landscaping & Pool, The Great Renovate | Tagged , , , , | 2 Comments

Photography for Sale

I don’t talk much about my photography here on the blog; strange I know. If you haven’t been over to my photography site be sure to check it out. I do mainly portrait and nature photography, but I also do fashion photography.I’ve been updating the site recently so the alignment is slightly off. Please excuse the appearance during construction, lol! 
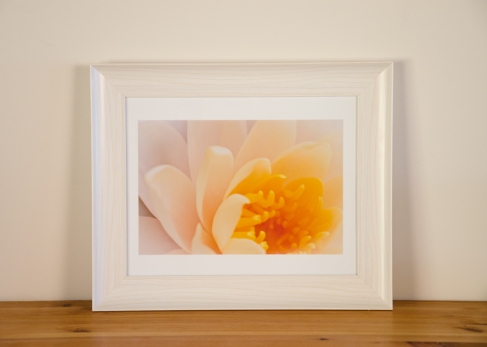
I just started selling prints of my fine art nature photography which are mainly waterlily shots that were taken in our pond. 🙂  The picture below is being donated to a local charity for an event they’re having.

Waterlily Print

Help me spread the word by forwarding this to a friend or liking KP Photography on Facebook.

Posted in Uncategorized | Leave a comment

I Finished My First Roman Shades!!
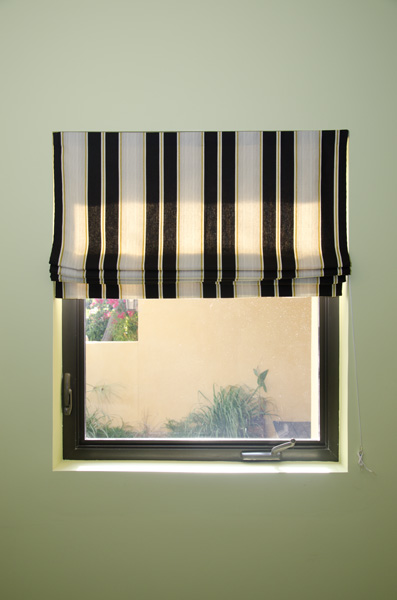
I’m so excited that I finished my first roman shades!!! This has been a long time coming but I finally committed to a fabric, broke out the sewing machine and made my first roman shades.

Gym Roman Shade

It feels really good. Especially since I priced having a roman shade made for this window at Calico Corners and they wanted $340 for the labor plus fabric. Crazy!! It actually didn’t take that long and wasn’t really that difficult.

I followed this tutorial, which is very detailed with pictures.

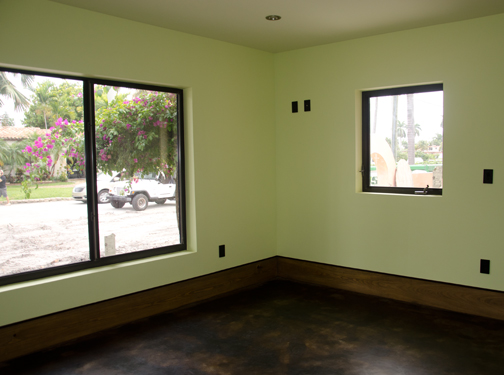
The fabric is by Waverly, which I bought at JoAnn’s at 40% off so the fabric ended up being $20/yd. I bought 5.5 yards for the two windows I’m doing so that was $110. I’m going to have some left over because I have to sew fabric together for the second window because it’s wider than the width of the fabric. I lined the face fabric with black out liner to prevent fading. The black out fabric was about $6/yd and I bought 5 yards with a coupon, so I think it was $25 for the liner fabric. Then you need the drawstring cord and rings to run the cord through, eye screws, dowel rod, mounting board and velcro. I guess everything was about $160 for the two windows. The other window is huge, it’s the one on the left below. I think it’s about 72″ wide.


Gym windows

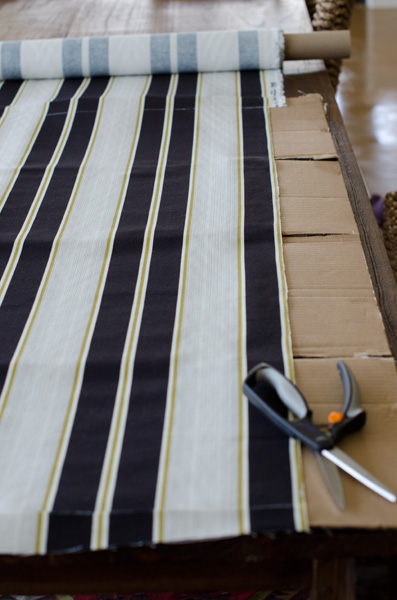
Here are some pics of the process…

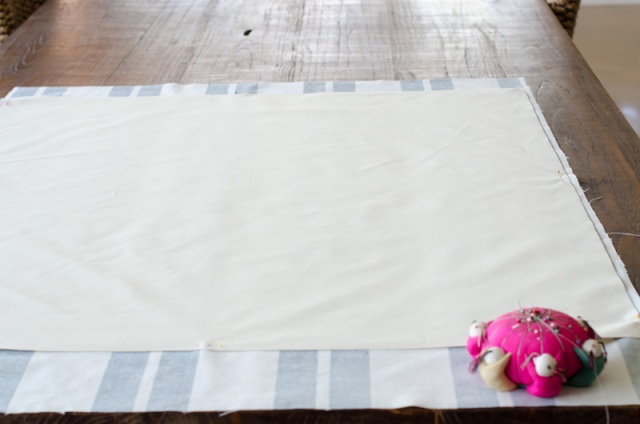
Be sure to square up the fabric so it hangs properly in the window. I did this using an L-square ruler.

Cutting the Fabric

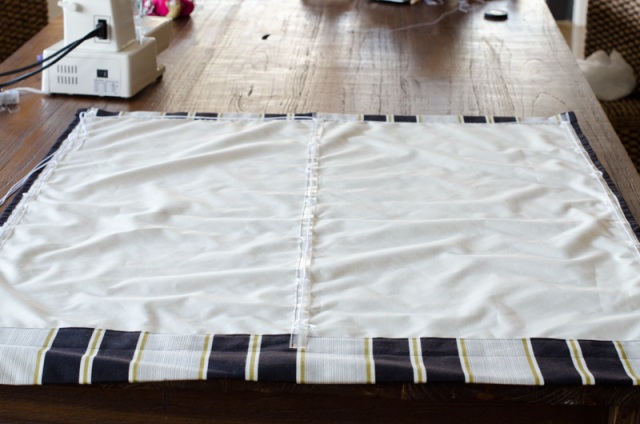
Laying out the liner and face fabric…

Laying out the face and liner fabric

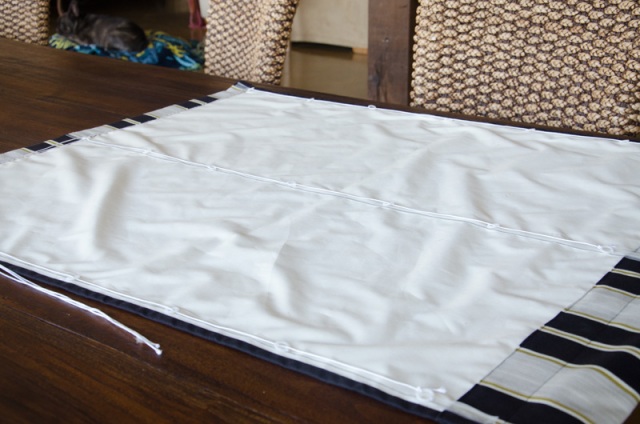
Below you can see what the finished shade looks like on the back side. I used a kind of plastic twill tape with rings attached that I sewed to the shade. I got lucky because they just happened to line up on the black stripe so the thread doesn’t show.

Roman Shade

Back side of roman shade

As I mentioned at the beginning, I followed instructions from another blogger and she did a great job so just go check out her instructions for all the details.

I can’t wait to start the next window so we can take down the black plastic covering the window, lol!!

Posted in Decor, DIY, The Great Renovate | Tagged , , | 4 Comments

Garden Love

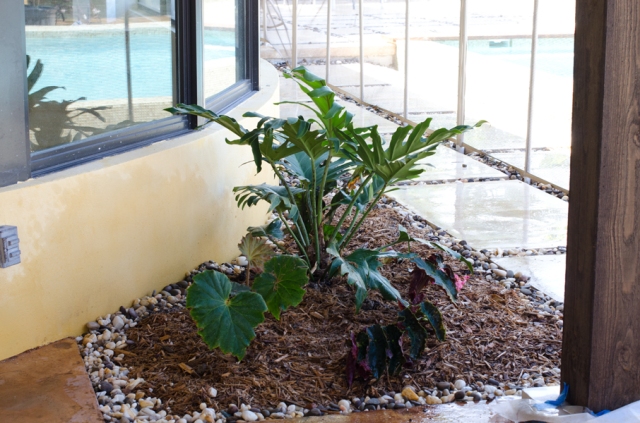
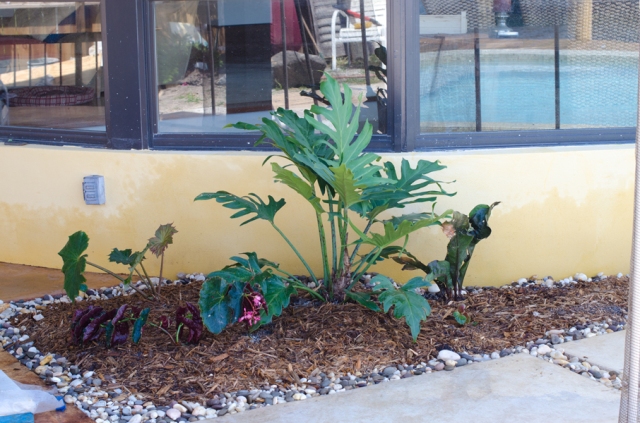
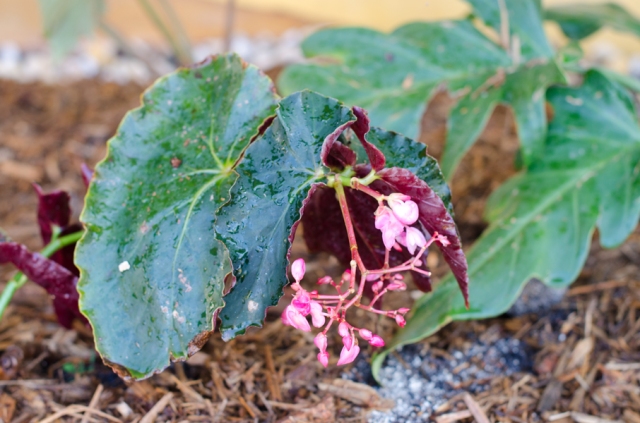
We planned to have a little planter bed next to the patio in the backyard so today we took advantage of the beautiful weather and planted this little area. The planter bed is under the patio roof so we knew to get shade plants. We also didn’t want anything that gets too tall that would block our view of the water. We chose an angel wing begonia, another type of begonia, a large leaf plant and another leafy plant with burgundy and green leaves.

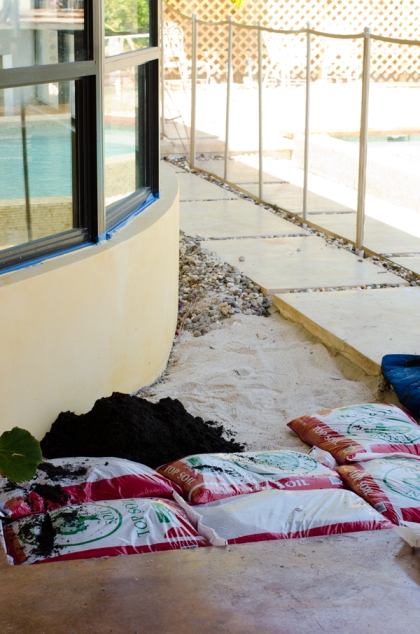
First we put a layer of sand so the area would drain well, then we added top soil and a little more sand. Then we got to planting.We topped it off with mulch and then added a border of river rock that we had left over.

planter bed

Finished planter bed

Finished planter bed

Angel Wing Begonia

The plants are a little small now but I’m sure they’ll fill in nicely. We would like to add one more begonia to the mix so we’ll be sure to pick one up on our next visit to the nursery.

Happy Easter!!

Posted in Landscaping & Pool, The Great Renovate | Tagged , , | 1 Comment

Good Morning

I started the day admiring the beauty of nature…

Nature Photography

Have a great Friday!

Posted in Photography | Tagged , , | Leave a comment